Friday 31 July 2020

Nothing is Safe!

It must be two years since I first set eyes on a decoupaged peace of work.  One of the ladies from the sewing group in my local U3A  brought some of her pieces in to show us, I was fascinated as I always am when I see a new craft and I can't figure out how it's done. Even if it's explained to me it takes a while for me to get it! Sheila tried to explain it to me very patiently it has to be said but I still wasn't convinced, how can sticking a piece of napkin onto a jar result into something so beautiful.

Sheila asked me and another lady (who was equally as fascinated as I was) if we would like to do a workshop at her home, of course! we jumped at the chance.  What a lovely day we had, Sheila was a great teacher her home is beautiful and she made us very welcome we even produced two pieces of work....


Please remember this was my first attempt but even so I was delighted with the result. Since then I haven't done that much apart from these..


Until now! I have time on my hands like I have never had before and I'm right back into it and nothing is safe! 


For those of you who haven't tried it decoupage is a very slow and messy business and it has to be done in stages. You start with the preparation, I like a white background which means things have to be painted, it may start with the one thing in front of you but you are sitting there with a wet paint brush or sponge and enough white paint to cover another object but which object? oh yes that jam jar would look nice or maybe the coffee jar ...


but why not both, oh and I'm sure there's an empty wine bottle in the recycling and so it goes on.


This plant holder was a dark cream colour with a huge chip as you can see.


Now transformed into a very pretty, looks like new plant holder.

Even as I go about my daily business my eyes are forever on the look out for possibilities. 


This was a drinking glass that had a crack down the side now disguised and beautifully displaying my Christmas cactus plant 


Canvas Decoupage is so easy! I have a few more cute napkins like this that will be finding themselves onto canvas soon too.
Of course last but not least Beach rocks I really can't stop! I have made so many of these and given quite a few to friends.  I think they are so pretty and I have written inspirational quotes on the back...


So you may ask is that it then? are you all done with the paint and the glue and the buying of pretty napkins, I have to say no I'm afraid not! I'm in the zone as it were I really can't stop! thank goodness for my summerhouse it has now been turned into my workshop, there no one can see the mess! 

Below is my next victim, I have moved beyond the confines of my home and I'm now into charity shop territory you can find all sorts of treasures in there, that bottle even has lights inside! just wait until it's had the decoupage treatment. I have sent for some rice paper for this which I have never used before so I can't wait to see how it turns out.


 What I'm actually going to do with this stuff once my decoupage obsession is over remains to be seen. 😂

Have a great weekend and take care. 😘

See all the great parties I will be linking to here

Wednesday 22 July 2020

Mosaic Crochet A Quick Guide

I have written this post about Mosaic crochet for those of you who are thinking of giving it a try, or for anyone who has tried it and would like links to other resources. I will include lots of links to patterns and tutorials.
If you are looking for Christmas mosaic patterns click on my A Mosaic Christmas Post here

I just want to quickly add here that I am in no way an expert in this form of crochet but I have done a bit of research and have learnt a few things myself while doing so. I won't be explaining how to do this technique but will provide links to expert designers who can do that much better than I can

I have discovered that there is more than one type of Mosaic technique the two most common I have found are Overlay Mosaic and Inset Mosaic.  You can see the differentiation of the two here along with a link to a written tutorial. There is also a link to a new mosaic crochet group on Facebook of which I have become a member, there is lots of information on there and you can be inspired by other members makes.

Overlay Mosaic Crochet


Quick facts

  • Change colour on each row. 
  • Worked in dc and tr stitches (English Terms)
  • You work from the right side of your work and each row is worked from right to left.
  • You always work in the back loop when working the dc sts and in the front loop one row down when working the tr sts.
  • You work from a chart and there is usually but not always written instructions.
  • You are left with lots of ends which can be...
  1. Enclosed in a double border.
  2. Woven in.
  3. Left as a fringe.
  4. Made into a twisted fringe.
  5. Yarn can be added to make tassels.
This video by Tinna Thorudottir Thorvaldaris is a great beginners guide 


I have used Overlay Mosaic for these blankets...


Queen Blanket


The designer for all of these patterns is Tinna Thorudottir Thorvaldar, she has some excellent tutorials on YouTube you can find her channel here
All her patterns can be found here on Ravelry.

This is the Hope square which Tinna designed during Lockdown and is a free pattern.


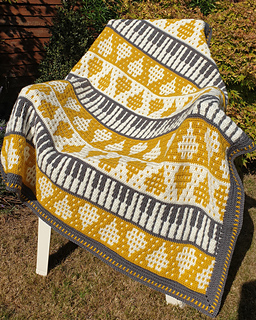
I have found that most overlay crochet patterns are paid which is quite understandable  when you realise the amount of work that must go into both the written instructions and the charts that go along with them, however while writing this  I did find this free pattern for this beautiful blanket below, The designer is Moira Douglas from daisyknots the blanket was introduced as a CAL but unfortunately the links for each week are no longer available and the pattern is no longer free, but you can purchase the pattern on Ravelry see below.


on stool - 1.jpg

Her Ravelry profile with all her patterns can be found here

Another stunning design - Northern Tyles by Mark Roseboom


This is a paid design and the pattern can be found on Ravelry here

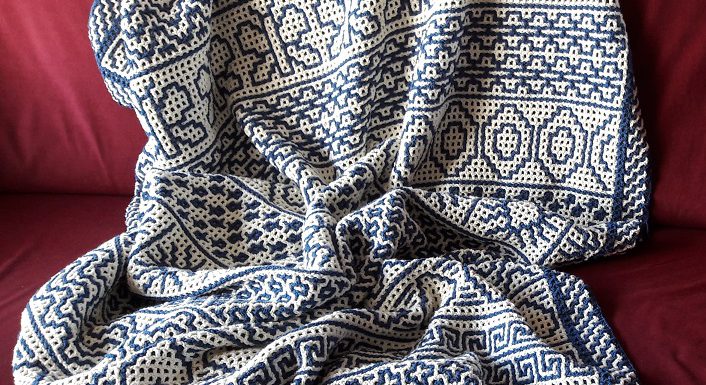
This blanket designed by the craftsteacher was first introduced as interlocked crochet and is still available as such, I really wanted to make this but the technique seemed beyond me, happily the designer converted the pattern to mosaic during lockdown and offered it for free for a short while. I'm happy to say that I managed to download it before it became a paid pattern.


It's been named the HAL CAL and you can find it here
See my version now completed here

More Patterns below

Bubbles Baby Blanket

Dancing Squares

by BebaBlanket

Designer Cyndie Birdsong


Inset Mosaic

This type of mosaic crochet is uncharted waters for me and as such I can't wait to try it, because I haven't tried it I can't say which technique is easier or which produces the best result, this type does have less ends so that is in it's favour I would say but I will reserve judgement until I have tried it.

NB - I have now tried this technique and although the results are lovely I much prefer the overlay form of mosaic crochet, I find it much easier and there are a bigger variety of patterns available.

Quick Facts..
  • You change yarn every second row.
  • You turn your work at each row.
  • You work in dc, chains and trebles. (English Terms)
  • You work from written instructions and there is usually a chart.
  • You can carry your yarn up the sides so there are less ends.
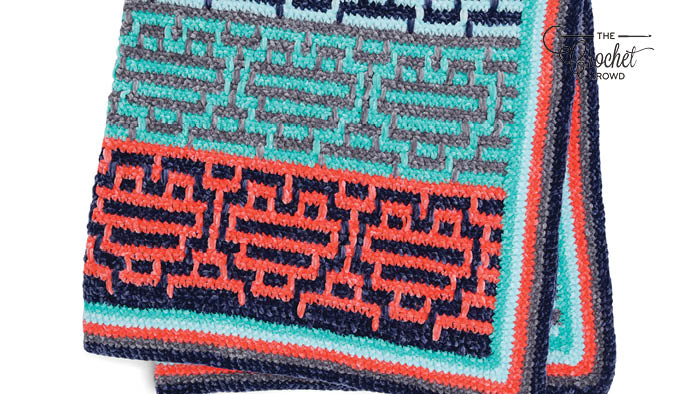
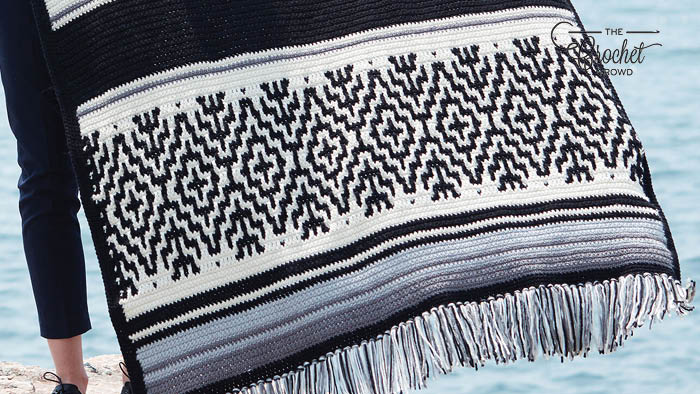
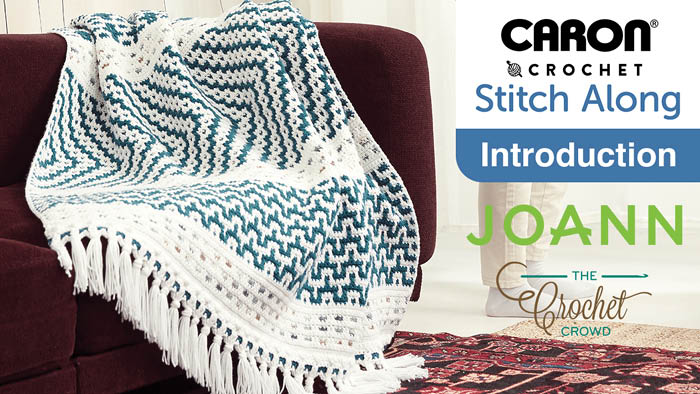
There are lots of  free patterns and video tutorials for this type of Mosaic crochet, here are just a few that I have come across. These can all be found here on The Crochet Crowd website

Crochet Heart Mosaic Baby BlanketCrochet Nordic Stripes BlanketJOANN Spring Stitch Along Crochet Mosaic Blanket

They all have video tutorials by Mikey.

i
Heart of Gold  - designer -  Rosina Plane a Paid pattern on Ravelry 
Also published in..

I will add more as and when I find them and I will pin this post to the top of my blog so that it is always accessible.

Click below for some great Christmas Patterns.....


If anyone has found any great mosaic patterns that they would like me to include on this page please let me know. Also if anyone has information about any other type of mosaic crochet I will add that too.


Featured at the Wednesday Link Party 2017

Friday 17 July 2020

A bit of Allsorts.

Firstly thank you all for the lovely comments you left for my Mosaic blanket in the previous post, I was quite surprised to hear that many of you hadn't heard of mosaic crochet before, I would urge you to give it a try because it's surprising just how easy it is. This is the one I have just started working on...


Well this week has been a bit of a mixed bag, I forced myself to get out for a walk it seems ages since I did so because of the awful weather we have been having it's much easier to stay cosy inside with your crochet hook but the weather improved and out I went..

I'm always happy once I do get out there I mean to say just look at this view at the end of my street..


a little bit dull I do admit but seeing that yacht on the water  quite lifted my heart, I usually take a circular walk it takes me just over an hour, or maybe a bit  more because I do tend to stop and admire and take the odd photo or two or do a little foraging, put it this way I never come home empty handed.


I have been wanting to make Elderflower cordial for weeks but I was afraid that it may be too late to find any flowers but luckily I found a few on my walk and was able to make some cordial for the first time and it turned out really well.  I managed to make one bottle and I filled an ice cube bag and put that in the freezer thinking I would be able to put Elderflower ice cubes straight into a glass of water but they haven't frozen so that's not going to work. Next time I'll freeze it  in small bottles.


I always go down onto the beach as part of my walk and collect a few beach pebbles, if you recall the idea was to paint them for my grandson Mikey.  I have spent a pleasant few weeks doing just that.  The problem is, this little one is learning so fast I can't keep up with him, he was crazy about numbers and letters and loved reciting the alphabet and saying his numbers so I duly made some alphabet and number stones


Then it was shapes, that boy knows the names of  shapes I didn't even know existed!


The latest craze is planets ...


I had them all made ready for when he came to visit last weekend he wasn't interested in the letters and numbers but he spent two hours playing with the shapes and loved the planets he lines them all up in the correct order and says what they all are.  He even knows the secondary planets but I'm going to have to look those up.😂


I'm trying to guess what he will be into next any idea's? he's just two and four months old but seems to be way ahead of what my kids were at that age.

I'm really enjoying the whole rock art thing, I have turned my summerhouse into a workshop because it is a messy business.  For Mikeys stones I have prepared the stones by washing them then painting them with acrylic paint, then printed pictures of numbers, letters, shapes and planets, cut them out and stuck them onto the rocks with Mod Podge,


I enjoyed hand painting these ladybirds....
I plan to have these dotted around my garden and there will be more just to hand out to friends when they pop by.  

Ladybird invasion!


At the moment some are getting the decoupage treatment actually the possibilities are endless I have to thank Linda from Crafty Gardener for giving me the idea she has done some great rock art you can see hers here

A couple of firsts
I know it's just a pansy but can you believe I sewed these seeds right back in March and they are just starting to flower, I was so excited I had to take photo of the first one to bloom.


The same can be said of the sweet peas and all of the seeds I have nurtured for weeks on end, they are taking an age to flower I have to ask myself if it's really worth it, all those weeks of waiting when you can just go out to the garden centre or supermarket and buy bedding plants quite cheaply and already established.


The rose is the Charlotte rose which I managed to rescue from my previous garden 3 years ago, it hasn't done a thing since then and has looked very weak I didn't think it would survive but look, a beautiful flower at last

It's Fully opened today

Have a great weekend and stay safe! 😘😘

Click here to see some of the great parties I will be linking to this week.

Friday 10 July 2020

I can't Believe I made this!

Indiana Afghan

The first time I was introduced to mosaic crochet was back in February 2019 when I followed the Havana CAL you can see the blanket here.  I was amazed that something that looks so intricate could be so easy to make.


You would think that Mosaic crochet would be a slow process because you use only single crochet and double crochet stitches ( US terms) and as the double crochet stitches are worked into the row below it means the blanket is only growing as high as a single crochet stitch row on row, however I found that this blanket grew quite quickly, it was started at the beginning of May and it was finished exactly two months later, I could have even finished it earlier but I was working on other projects at the same time, I think two months for a blanket this size isn't too bad at all.


I've had this on my to do list for a long time and have been itching to make it but then I have to ask myself  do I really need another blanket? My family are inundated with my blankets so who can I give it to, most of the blankets I make go to charities but they weren't accepting donations because of Covid-19, in the end I asked a friend... can I make a blanket for you? and he said yes of course!! so I had my excuse to start yet another blanket. (One of these days I will go back and have a blanket count just for fun to see how many I have made over the past few years)

mosaic, crochet, easy,afghan,blanket

I loved making it and watching all the patterns reveal themselves like magic, the designer makes it easy as the pattern is very clear and explicit.  I found the hardest part was the star design which I made harder for myself by using black yarn, I really struggled to see the stitches, (note to self ... avoid dark colours!) but it was worth all the hassle as I just love those stars.


I chose not to make the double border and made a twisted fringe instead, which I made as I went along so I didn't have the whole lot to do at the end, the hardest part of that process was getting the fringe the same length, it's not perfect but it will do and I'm sure the recipient won't even notice it's a bit uneven  anyway. 


Stats...
It took 1100 grams of dk yarn, most of which was Stylecraft special Dk which I already had in my stash, I added a few balls of Hayfield Bonus which I can buy locally. The pattern calls for aran/worsted weight so I added more stitches and worked more rows to get a decent sized blanket it measures  40" x 65".  If I make it again I will add enough stitches so that I have five of the star pattern repeats just to make it that bit wider. 

The designer is Tinna Thórudóttir Thorvaldsdóttir and you can buy the pattern here on Ravelry 


I want to make all this designers patterns as I love them all, but then I'm just completely hooked on Mosaic crochet at the moment.  I have just started another blanket (this time for me) but it's a different designer and I'm struggling, I'm hoping that once I get used to her way of writing it will be easier.


Have you tried mosaic crochet? do you love it like I do? I would love to see your work.😃

Have a great weekend and stay safe!😘😘

See the great parties I will be linking with here